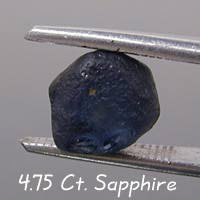
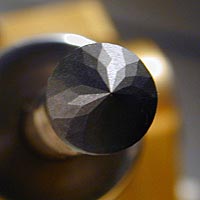
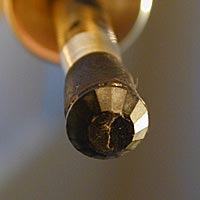
The photo above is of a Songea sapphire I'll be cutting on this page.
As you can see, this stone is not quite round, so we'll fix that by preforming
it a bit.
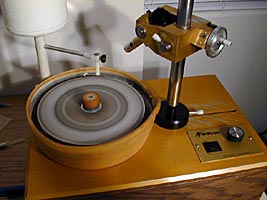
Here's a photo of my Facetron faceting machine. Not too hi-tech,
but very precise.
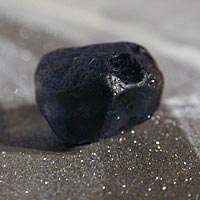
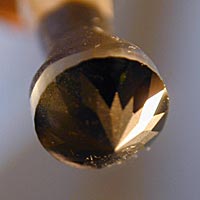
Here's a close-up of the sapphire sitting on the diamond impregnated
steel lap (or disc). You can see the diamond crystals sparkling.
Since diamond is the only natural substance harder than that sapphire,
diamond is what it must be cut with.
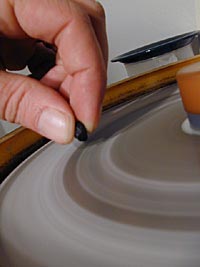
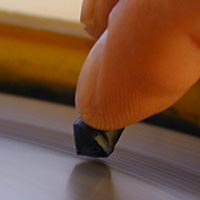
With the lap spinning, and water dripping on it that serves as a coolant
and lubricant, I am preforming the stone by hand, and basically just rounding
it off and grinding a flat spot on top of it.
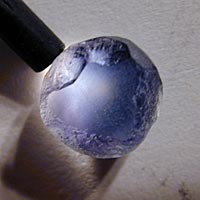
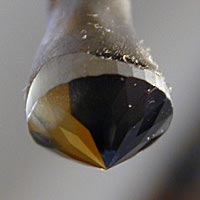
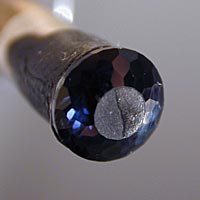
Here I'm using a fiber optic light to show that I've got it pretty
round, and you can see the flat spot in the middle that will eventually
be the table of the stone.
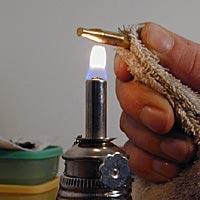
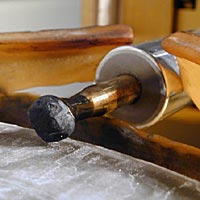
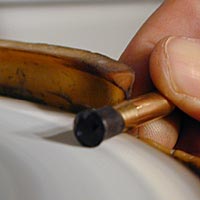
Next, I'm heating up the "dop" which is a brass stick that I'll attach
the stone to using a special wax. This stick, will then be plugged
into the arm of the faceting machine.
Here I have the stone stuck to the dop, and before the wax cools to
become hard, I have placed it into the transfer jig, and used a cone dop
pressed down on it to center it perfectly.
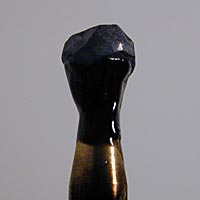
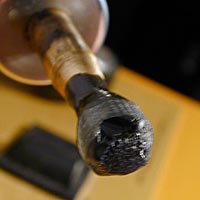
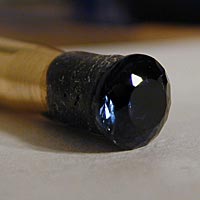
Here's a close-up of the stone on the end of the dop.
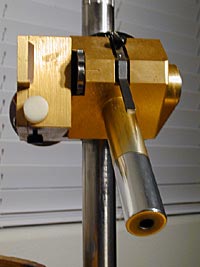
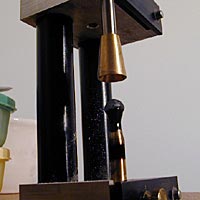
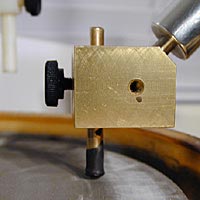
Here's a front view of the faceting head of the machine. You
can see where the dop plugs into the end of the arm in the lower part of
the photo. The arm raises and lowers in degrees, and rotates in equal
increments. In other words, if it has a 96 index gear on the top
end, it rotates in a circle divisible by 96 equal segments. Also,
the entire head slides up and down the stainless steel mast and can be
locked in to place at any position.

Looking more downward on the faceting head, you can see the black,
replaceable index gear, and see that the entire arm, gear, etc. pivot on
a big hinge of sorts. To the left is the square cutting depth indicator
and once I've completed the first in a series of facets, or flat spots,
a needle will rise up and show me when I've cut all the following facets
to the same exact depth as the first one.
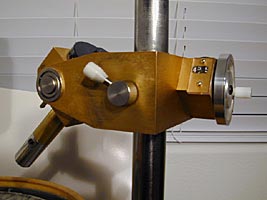
From this view, you can see the crank at right that raises and lowers
the arm in degrees. Notice the little black guage next to it that
tells what angle the machine is set at. In this case, 45 degrees.
Also, the white nob is the locking mechanism that clamps the head down
at a certain height on the stainless steel mast.
Okay, here we go. In this photo I've inserted the dop into the
end of the arm, and have locked it in place with the "key" in the upper
right. Now we're ready to start cutting.
First, I'm going to set the arm at 90 degrees and cut a series of flat
spots around the edge, or girdle, of the stone and make it perfectly round.
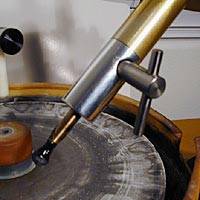
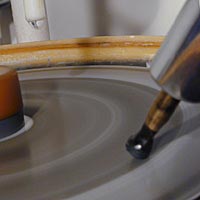
Here's a zoomed in look at cutting the girdle. I lower the arm
down onto the spinning lap, make a little flat spot, rotate the arm a small
amount and repeat, all the way around the stone.
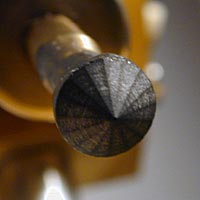
Here's what it looks like after being rounded off. Notice all
the little flat spots. Later, I'll smooth those off on an ultra-fine
diamond lap.
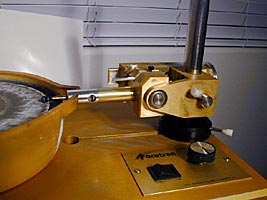
Next, it's time to raise the faceting head up the mast, change the
angle and begin cutting the facets that will form the point at the bottom
of the stone. This point is called the "culet" of the stone.
In the upper left corner of the photo, you'll notice the watter dripping
from a white tube. Again, this is the coolant and lubricant that
keeps the stone from heating up, melting the wax, and falling off the dop.
The stainless steel lap is now spinning fairly fast.
Now, I've gone all the way around the stone, and cut 16 rough facets
that will allow me to establish the depth of the "pavillion" which is the
bottom of the stone. Next, I'll change to a finer grit diamond lap,
and begin the final cutting of smaller facets that will be all ready for
polishing.
Here you can see the design I've chosen, or made up in this case.
It's a Portuguese style pattern that has twice as many facets as a standard
round brilliant. Next, the time consuming process of polishing
an extremely hard sapphire.
Here I'm using a fine diamond paste on an aluminum lap. The aluminum
transfers the heat out of the sapphire a lot better than other polishing
laps, and lets me polish harder without melting the wax that holds the
stone on the dop. It can be a real nightmare when the stone shifts
or fall off.
Here you can see that I've polished some of the facets. Not the
greatest photo, but you get the idea.
In this photo, I've polished the entire pavilion and it's ready to
be transferred to a cone dop, so that I can cut the "crown" or top of the
stone.
![]()
This is the transfer jig. At the top of the photo, is the dop
with the stone still attached. At the bottom of the photo is the
cone dop, that I've covered in hot wax and made an impression in by sliding
the two together, then pulling them apart. Next, I'll put one drop
of crazy glue into the wax impression in the dop at the bottom of the photo,
and slide the jig to put the two together.
![]()
The jig was sitting up on end, but is now sitting down flat which I
did after sticking the new dop to the stone using the crazy glue.
The dop on the left is the one receiving the stone, and it is in a metal
clamp device that slides on the two black rails at the bottom of the photo.
The clamp on the right is fixed on the rails. Thmbscrews tighten
the clamps down to hold the dops in place. After the glue has dried,
I'll remove both dops from the jig, and melt the original one off using
the alcohol lamp.
Next, I'll plug the dop with the stone on it back into the machine
and start cutting the facets of the crown. Notice you can still see
a little wax in the middle of the stone from where the original dop was
stuck onto it.
Now, I've cut and polished all three rows of 16 facets that make up
the crown of the stone. LOOK! It's starting to tease us a little
with some blue sparkles. This is where it starts to get kind of exciting,
because the first signs of what it will look like are starting to show.
You can see that now I need to cut the "table", or flat spot on the top
of the stone.
Cutting and polishing the table requires the use of this adapter that
is plugged into the arm of the machine.
After the table is cut and polished, which can take awhile with a bigger
sapphire like this, the last step is to polish the "girdle" or edge of
the stone. A lot of cutters don't like to hassle with it, but I always
polish it because it would look ugly and be quite obvious especially in
a prong-type mounting.
HOORAY!!!! It's done! But wait, it still doesn't look like much.
Here's a good lesson on why you should keep your stones clean. Having
the pavilion all gooped up kills the brilliance. In this case it's
because of crazy glue and wax, but hand lotion can really do a number too.
Now for the best part of the whole process. It's hard to tell what
it really looks like until you remove it from the dop and clean the goop
off it. Hmmm. It looks a little different than it did at the
top of the page!

IS THAT AMAZING OR WHAT?
GO TO MAIN PAGE or use your browser's back button to return to the previous page.